Fleas spread diseases like tapeworms and the bubonic plague and cause health problems in pets, such as skin irritations and anemia. Moreover, their bites are itchy, uncomfortable and can cause allergic reactions, so keeping them out of your living spaces is paramount.
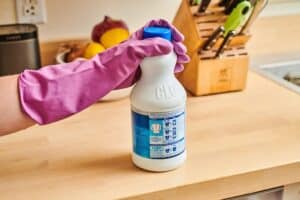
There are many effective and simple ways to eliminate these annoying insects, among using bleach to kill fleas. This powerful disinfectant is often used to wipe or clean different areas, including bathrooms and shared surfaces.
This post explores how long does it take for bleach to kill fleas.
Does Bleach Kill Fleas?
Bleach kills flea eggs, larvae, and adult fleas if used correctly. You can use color-safe and white bleach to eliminate these bugs efficiently, as the chemical’s poisonous and acidic nature works against the flea’s biological tissues by decomposing them.
Bleach can kill fleas on various surfaces. These include concrete, vinyl, carpet, fabric, glass, metal, and stone. However, do not use bleach on wood because it destroys such surfaces, and the fleas hiding under the surface grains won’t be affected.
Also, bleach works best on smooth surfaces without pores or deep places fleas can escape to. It is also best used on surfaces you can effortlessly rinse or wipe.
Related posts:
- How long does it take baking soda to kill fleas
- How to tell how bad a flea infestation is
- Can I Rub Lemon Water On My Pets To Get Rid Of Fleas?
How Long Does It Take For Bleach To Kill Fleas?
Fleas will start dying 2 to 3 hours after contact with bleach, but sometimes it can work instantly. The duration it takes this chemical to eliminate these bugs varies based on the bleach’s concentration, the surface applied, and the severity of flea infestation.
Also Read: Does hot water kill fleas and their eggs?
How Do You Mix Bleach And Water To Kill Fleas?
As mentioned earlier, you must use bleach correctly in order to kill the fleas without damaging your surfaces and putting yourself, your kids, and your pets in danger. So, here’s what to do to mix bleach and water.
Related Post: Does dawn dish soap kill fleas?
a) Gather The Supplies
Before working, find everything you need to create this flea killer. You will require bleach, water, a measuring cup or container, a spray bottle, and gloves. Also, keep your little ones and pets out of your working area to avoid accidents.
b) Read The Label
Working with bleach calls for caution. Part of that is ensuring the bleach you have is suitable for dilution and safe for the surfaces you plan to treat. Also, do not disregard the instructions or precautions mentioned on the bleach bottle.
c) Prepare the Bleach Solution
To create a suitable bleach solution to kill fleas, you require 1 part bleach to 10 parts water. Carefully measure the appropriate amounts of bleach and water and pour them into a container. Ensure the container can hold the entire solution and has a secure lid for storage if needed.
d) Mix The Solution Thoroughly
Stir or shake the mixture well to ensure the bleach and water combine evenly.
Note
Before handling bleach, put on protective gloves, eye protection, and a mask. Also, work in a properly ventilated area because bleach can produce harmful fumes when combined with other chemicals. The effects of these fumes exacerbate in poorly ventilated places as the fumes accumulate and become more concentrated.
Therefore, ventilation helps to maintain good air quality by removing or diluting airborne pollutants. Working in a well-ventilated area helps reduce the concentration of bleach fumes and allows fresh air to circulate, creating a safer and more comfortable environment.
Related Post: How to get rid of fleas on cats
How Do You Use Bleach To Kill Fleas?
After making the bleach solution to kill fleas, the next steps involve applying it correctly to eliminate these annoying bugs successfully. Here’s what to do:
1. Find The Flea Infested Areas
The bleach must come into contact with adult fleas, larvae, and eggs in order to kill them. For this reason, you cannot apply the bleach solution just anywhere; you must concentrate on areas these insects typically hide.
These include:
i) Pet Bedding
Inspect your pet’s bedding, including their blankets, cushions, and sleeping areas, because fleas often gather in these cozy spots.
ii) Carpets And Rugs
Fleas can also hide and lay eggs in the fibers of carpets and rugs, particularly in areas where pets spend a lot of time.
iii) Upholstered Furniture
If your pets tend to rest or sleep on your upholstered furniture, such as sofas and chairs, inspect them because they can transfer fleas to these places.
iv) Cracks and Crevices
The cracks and crevices in your floors, furniture, and walls provide fleas with perfect hiding spots. Therefore, check them for the presence and signs of fleas. Besides killing the fleas living in these areas and cleaning the areas afterward, seal these gaps to prevent future infestation.
v) Pet Toys
Your pet toys can be hiding spots for fleas, especially if they are made of fabric or have crevices where fleas can lay eggs or hide. Therefore, ensure you examine them when locating fleas in your home.
Begin by inspecting the surface of the toys for any signs of fleas or flea dirt (black specks resembling pepper). Pay close attention to seams, stitching, and any crevices where fleas might hide. Also, shake the toys vigorously or tap them against a hard surface to dislodge any fleas or flea eggs hidden inside them.
Furthermore, inspect any other items your pets come into contact with regularly, such as brushes, grooming tools, and carriers.
vi) Outdoor Areas
After inspecting your indoor spaces, move outside because fleas can also live outdoors. Fleas can be found in your yard’s grassy and shady areas, and also the soil. You can tell this if you see pets scratching excessively or small jumping insects.
Fleas thrive in shady, humid areas, so inspect under trees, shrubs, and bushes on your property. You can also find them among mulch and plants in your flower beds or garden. In addition, check burrows, tree hollows, or under decks where wild animals like squirrels, raccoons, or stray cats can be found because they can introduce fleas to your home.
Moreover, examine outdoor resting spots such as doghouses, kennels, or shaded patio furniture. Additionally, other outdoor structures like sheds and storage units can host fleas.
2. Test The Bleach Solution
Before spraying the infested areas with the bleach solution, test it on a small area to make sure it doesn’t lead to discoloration or damage. Select a small, hidden, or less noticeable spot. This could be a corner, underside, or area normally covered or not easily visible.
Apply a small amount of the diluted bleach solution to the chosen test area using a cloth or sponge, making sure not to oversaturate the surface. After that, let the bleach solution sit on the test area for a few minutes, typically around 5 to 10 minutes. Take note of any changes in color, texture, or damage to the surface.
Once the waiting period elapses, thoroughly rinse the test area with clean water to remove the bleach solution. Then, inspect the surface to determine if there are adverse effects, such as discoloration or damage.
The surface can handle the bleach solution if you don’t see noticeable negative effects after rinsing. However, proceed cautiously and consider the specific materials present in different areas and their tolerance to bleach.
3. Apply The Bleach Solution To The Infested Areas
Spray the bleach solution in the areas you identified while locating the flea-infested areas. Pay attention to the gaps, crevices, and nooks fleas can hide because they will only die if they come into direct contact with the bleach.
Keep applying the solution until you saturate all the spots with bleach. After that, let the solution soak in for about 2 to 3 hours to ensure the fleas touch the solution as many times as possible, increasing the chances of the chemical eradicating the flea population.
4. Rinse Off The Bleach
After waiting 2 to 3 hours, thoroughly rinse the treated area with clean water to remove the bleach solution residue from the surface. Next, carefully inspect the surface for any damage, changes, or discoloration. Pay attention to any adverse effects that may have resulted from the bleach solution.
5. Vacuum and Wash
Vacuum surfaces like carpets, rugs, and upholstery with a strong suction power and preferably a brush attachment to remove dead fleas, eggs, larvae, and residual debris. After that, empty the vacuum bag or canister. Also, seal the contents in a plastic bag then dispose of it responsibly.
Wash all washable items you treated with bleach, such as pet bedding, blankets, towels, and any fabric covers. Use hot water and an appropriate laundry detergent to wash them, then dry them with high heat, as it will help kill any remaining fleas, larvae, or eggs.
Also, wipe the non-washable items like pet toys with warm soapy water or use pet-safe disinfectant wipes and a clean cloth.
Conclusion
You can effectively kill fleas with bleach but expect results in 2 to 3 hours after they come into contact with the chemical. Also, while eliminating these bugs is the primary goal, protecting your surfaces is important since bleach can damage them.

I’m Mike Hyle, an exterminator with 7+ years of experience handling all sorts of pests, including mice, cockroaches, bed bugs, and termites. I also write for Pest Solutions DIY blog to share my knowledge and help homeowners keep their homes pest-free. Outside work, I enjoy hunting, snowshoeing, and exploring nature. Check out my blog for helpful pest control tips!